What is a Shield?
An Arduino shield is a piece of hardware that can expand the uses of an Arduino board. It's designed to be placed directly on top of the Arduino Uno. It can focus the Arduino’s capabilities to perform cooler and better tasks. They are designed to be placed on top of an Arduino and connect directly to its pins. There are many different types of shields from display shields to wireless shields to motor shields. This project uses a motor shield to connect two DC motors to an Arduino.
What is an IR Remote and Receiver?
An IR remote is a type of remote control that uses Infrared (IR) light to send signals to a receiver. The remote encodes different button presses as unique signals, which are transmitted via IR light. The receiver decodes these signals to perform specific actions.
In this project, the IR remote allows you to control the car wirelessly. The Arduino processes the signals from the IR receiver and translates them into commands for the motor shield, enabling movements like forward, reverse, left, or right.
Materials Needed
- Car kit (two DC motors, battery pack, three wheels, base) *I use the ____
- Arduino Uno
- Battery
- Battery connector
- HW-130 Motor Shield
- Wires
- IR receiver and remote
Assembly Instructions
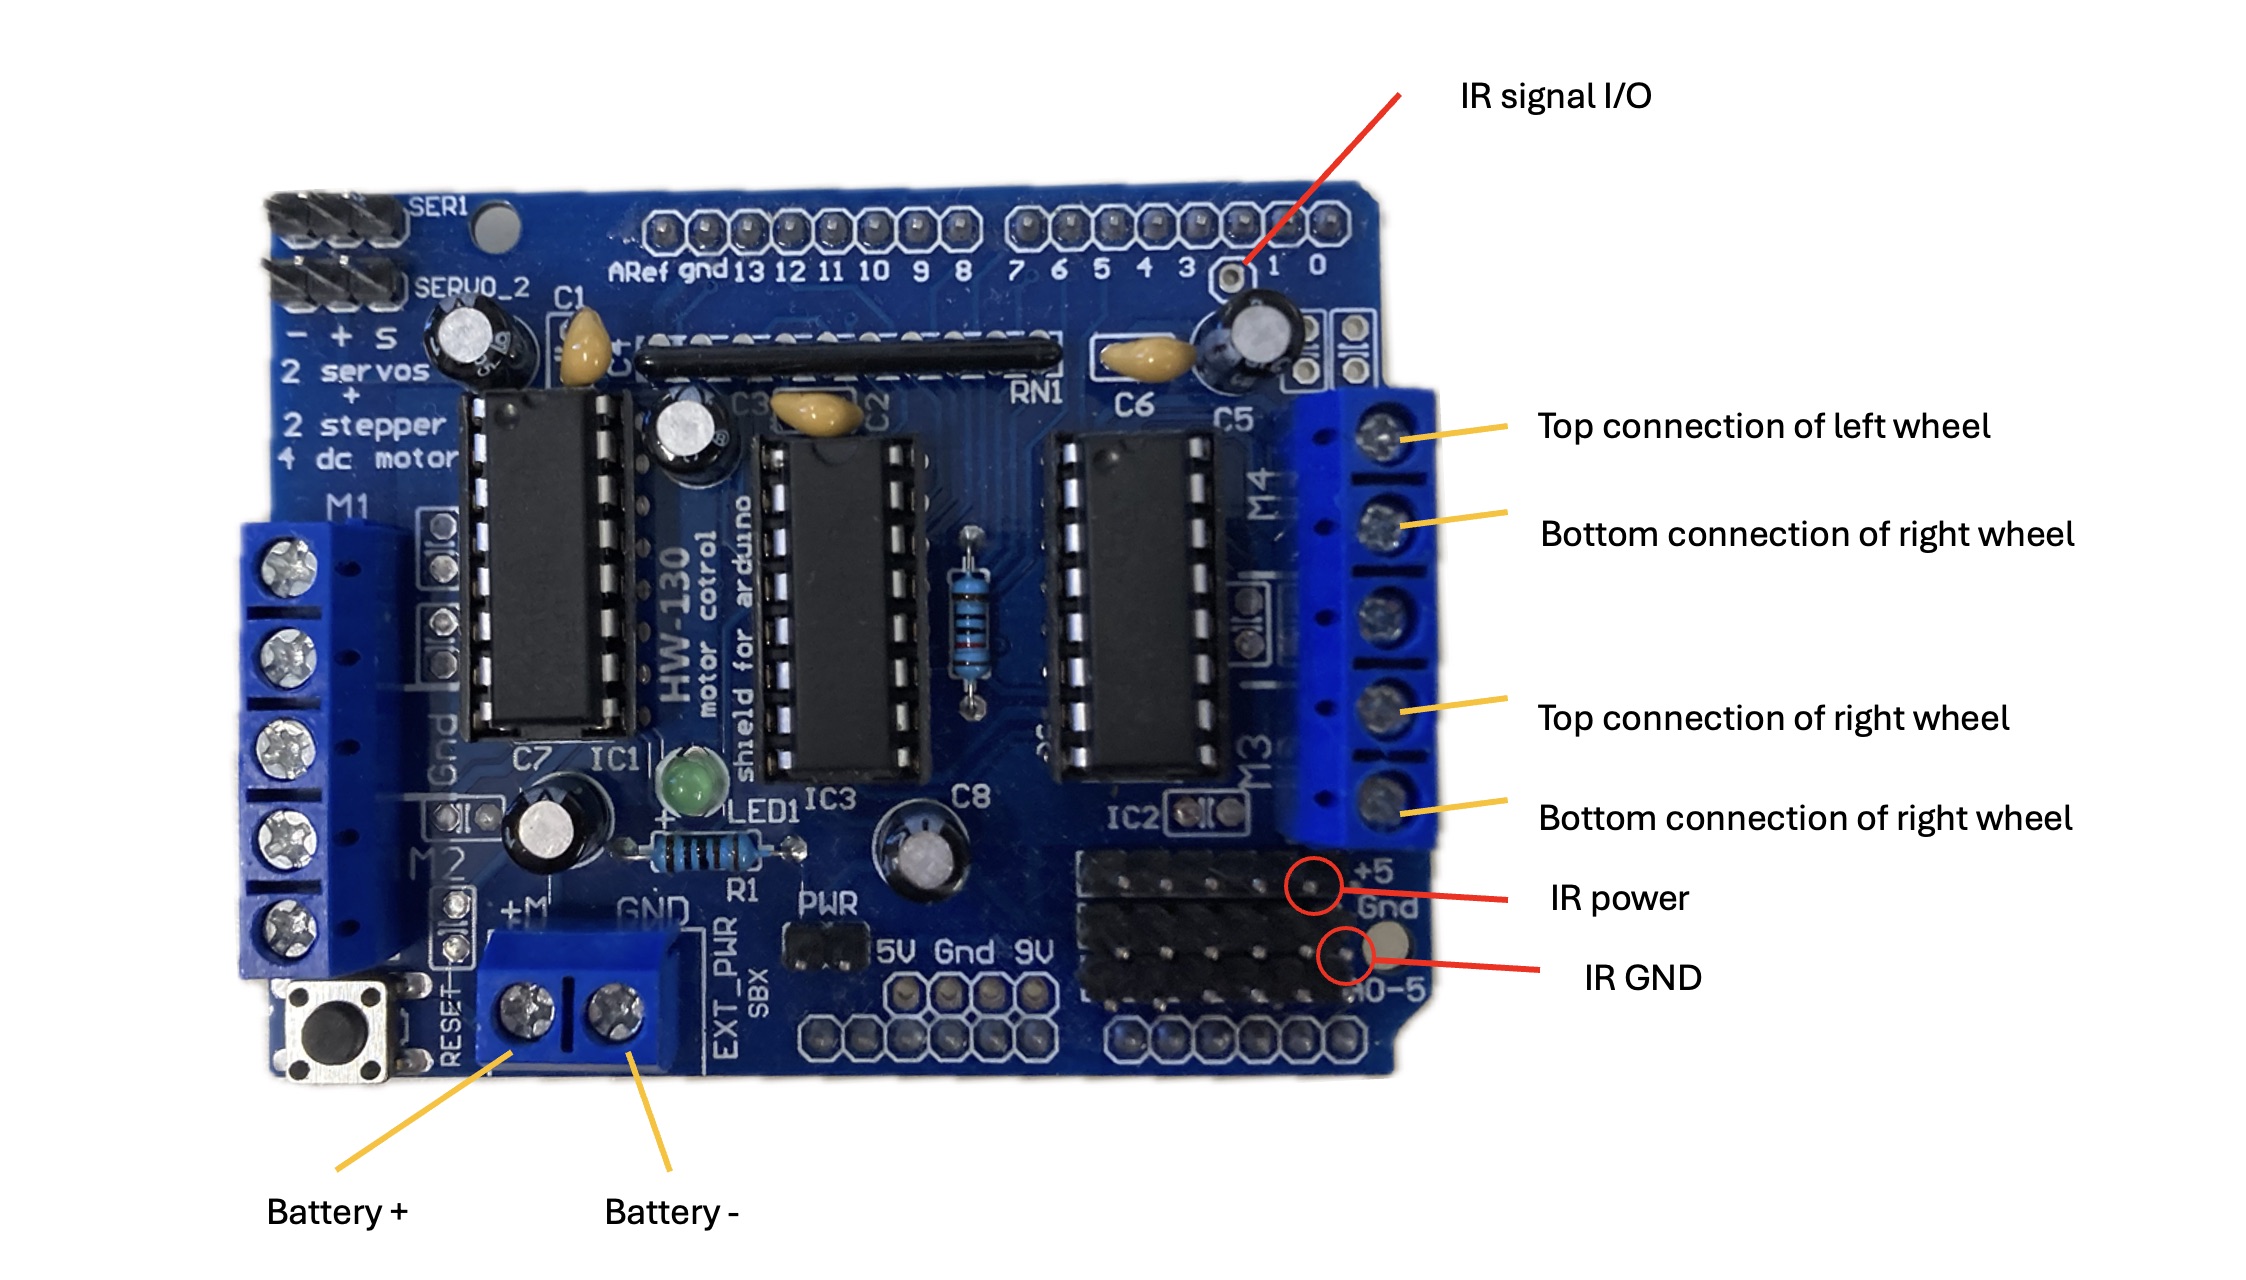
These are the connections needed to assemble your remote control car:
| Component | Connection to Motor Shield |
|---|---|
| DC Motor 1 (Right Wheel) | Port 3 (M3) |
| DC Motor 2 (Left Wheel) | Port 4 (M4) |
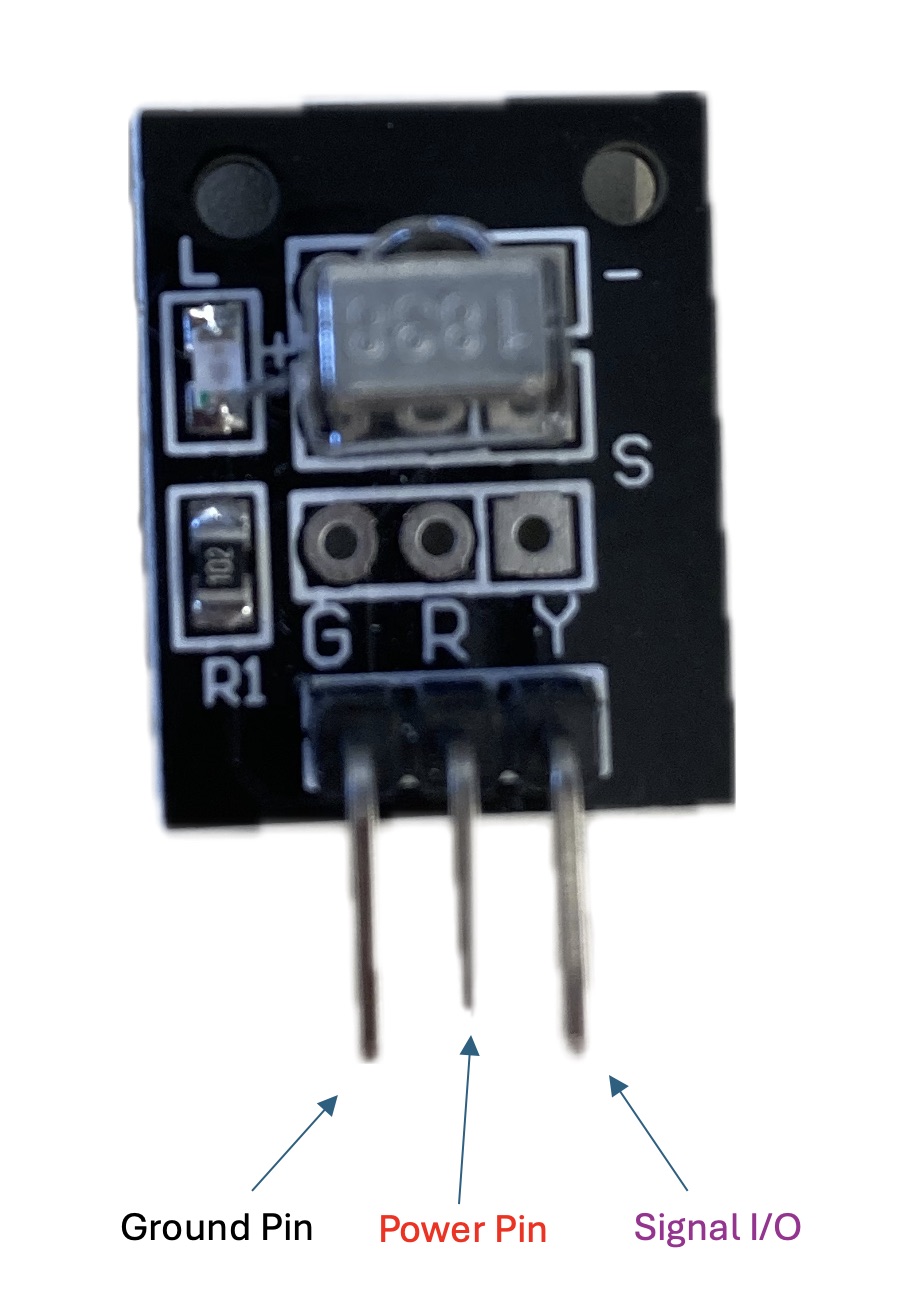
| IR power (R) | Power pin (+5) |
| IR ground (G) | Gnd |
| IR signal (Y) | Digital pin 2 |
| Battery + | Power input (+M) |
| Battery - | GND |
Arduino Uno Code
Below is the code to program your Arduino Uno for controlling the remote control car:
        #include <AFMotor.h>
        #include <IRremote.h>

        AF_DCMotor motor(3);
        AF_DCMotor motor1(4);

        int IRpin = 2;
        IRrecv irrecv(IRpin);
        decode_results results;
        unsigned long repeat = 0;

        void TurnRight() {
          motor1.setSpeed(200);
          motor1.run(FORWARD);
          delay(1000);
          motor1.run(RELEASE);
        }

        void TurnLeft() {
          motor.setSpeed(200);
          motor.run(FORWARD);
          delay(1000);
          motor.run(RELEASE);
        }

        void GoForward() {
          motor.setSpeed(200);
          motor1.setSpeed(200);
          motor.run(FORWARD);
          motor1.run(FORWARD);
          delay(1000);
          motor.run(RELEASE);
          motor1.run(RELEASE);
        }

        void GoBackward() {
          motor.setSpeed(200);
          motor1.setSpeed(200);
          motor.run(BACKWARD);
          motor1.run(BACKWARD);
          delay(1000);
          motor.run(RELEASE);
          motor1.run(RELEASE);
        }

        void setup() {
          Serial.begin(9600);
          irrecv.enableIRIn();
        }

        void loop() {
          if (irrecv.decode(&results)) {
            if (results.value == 0xFFFFFFFF) {
              results.value = repeat;
            }
            switch(results.value)
            {
              case 0xFFC23D:
                TurnRight();
                break;

              case 0xFF22DD:
                TurnLeft();
                break;

              case 0xFF629D:
                GoForward();
                break;

              case 0xFFA857:
                GoBackward();
                break;

              default:
                break;
            }
            repeat = results.value;
            irrecv.resume();
          }
        }
Required Libraries
You will need to install two libraries for this project:
- Adafruit Motor Shield Library: This library allows you to use the motor shield with the Arduino. You can install it via the Arduino Library Manager or download it from the official repository.
- IRremote by shirriff: This library is required to decode the signals sent by the IR remote. It is available through the Arduino Library Manager or from the GitHub repository.